Post 61: Octave vent removal holes must be sealed too…
In previous posts, we have shared with you how to remove, clean and re-install your octave vents. We have showed you how to seal your octave vents and we’ve talked about if you should seal your octave vents. We even have an article describing reasons why you may be getting water in your octave vents.
As a quick summary, in case you have not read our previous octave vent articles, WE DO recommend that you seal your octave vents. Normally when you seal octave vents you would seal the outside circumference of the vent, sealing the space between the vent and the oboe body. BUT recently, we serviced an oboe where the octave vent removal holes were drilled all the way through the vent, which adds more places to leak!
Most people will never have a situation like this because normally octave vent removal holes are NOT drilled all the way through. But just in case your octave vent removal holes are drilled through, you will need to pay special attention to not only sealing the circumference of the vent, but the removal holes as well. Sealing the removal holes is not difficult, but it does take a little extra time and attention.
Photo number 1 below is an example of a “normal” octave vent where the removal holes have not been drilled all the way through. In this instance, the removal holes are drilled just deep enough to allow the removal tool to grab and turn the vent. Since the removal holes are not drilled all the way through, the holes themselves are sealed and will not cause any issues when you seal the vents under normal circumstances.
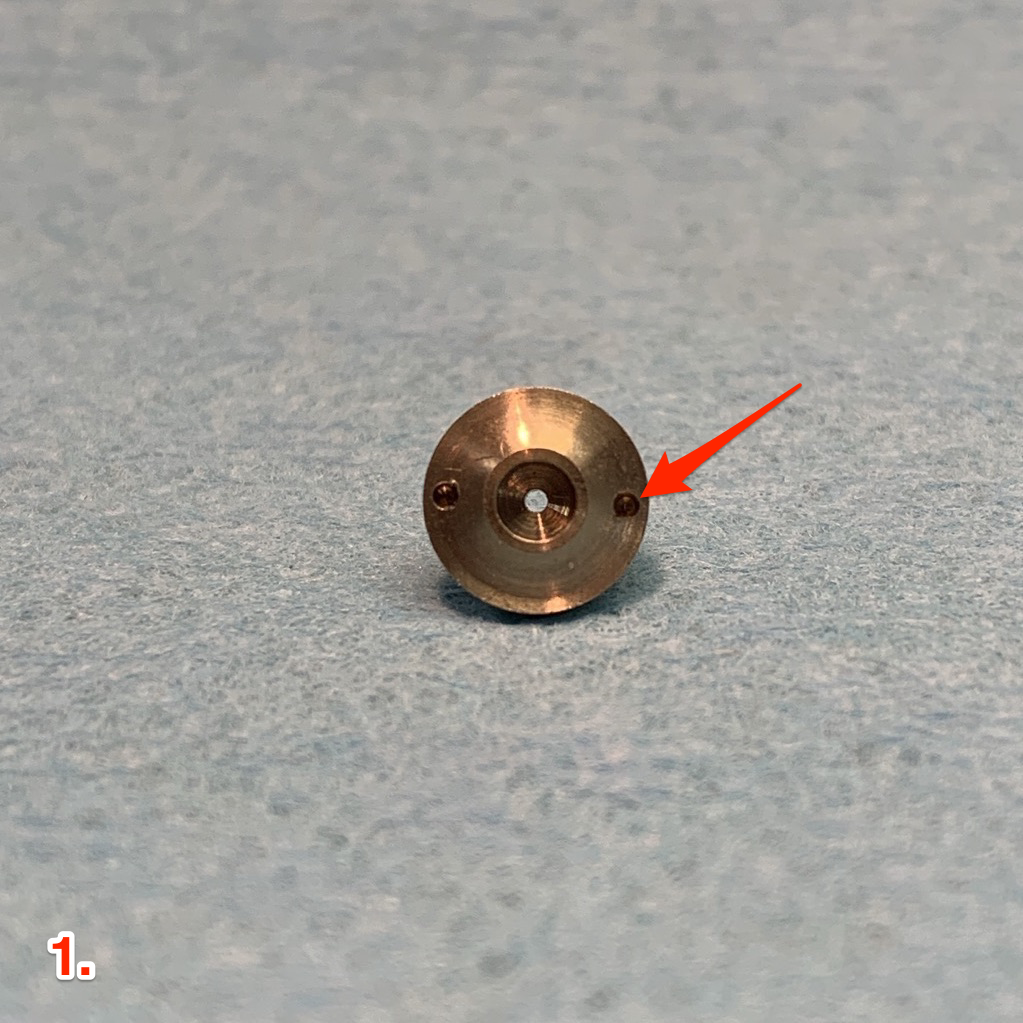
Photo number 2 is a pic of the troublesome vents in question. If you compare pictures 1 and 2, you will notice that you can see the background blue cloth through the vent removal holes in picture 2, but not picture 1. If octave vent removal holes are drilled through, when you re-install these vents and seal the outside circumference, the vents will still leak through the unsealed removal holes.
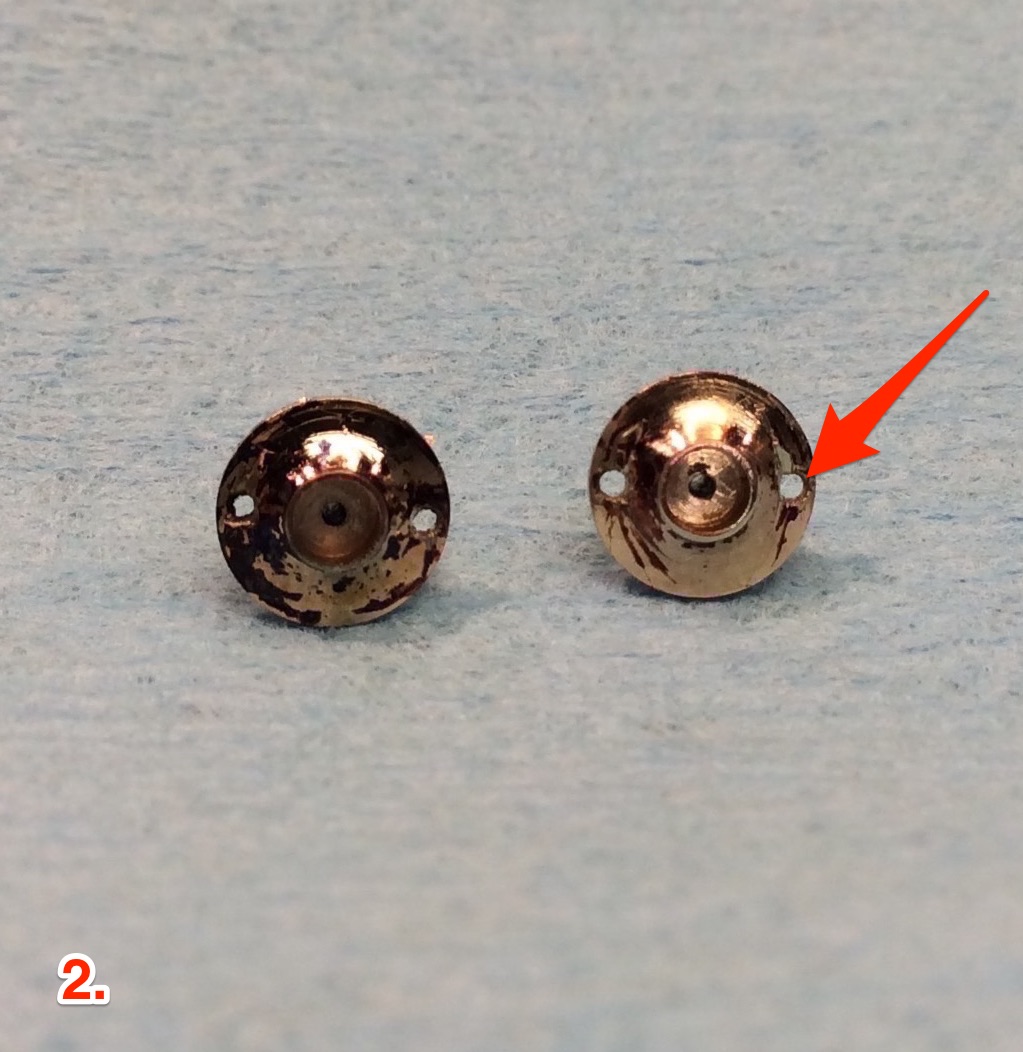
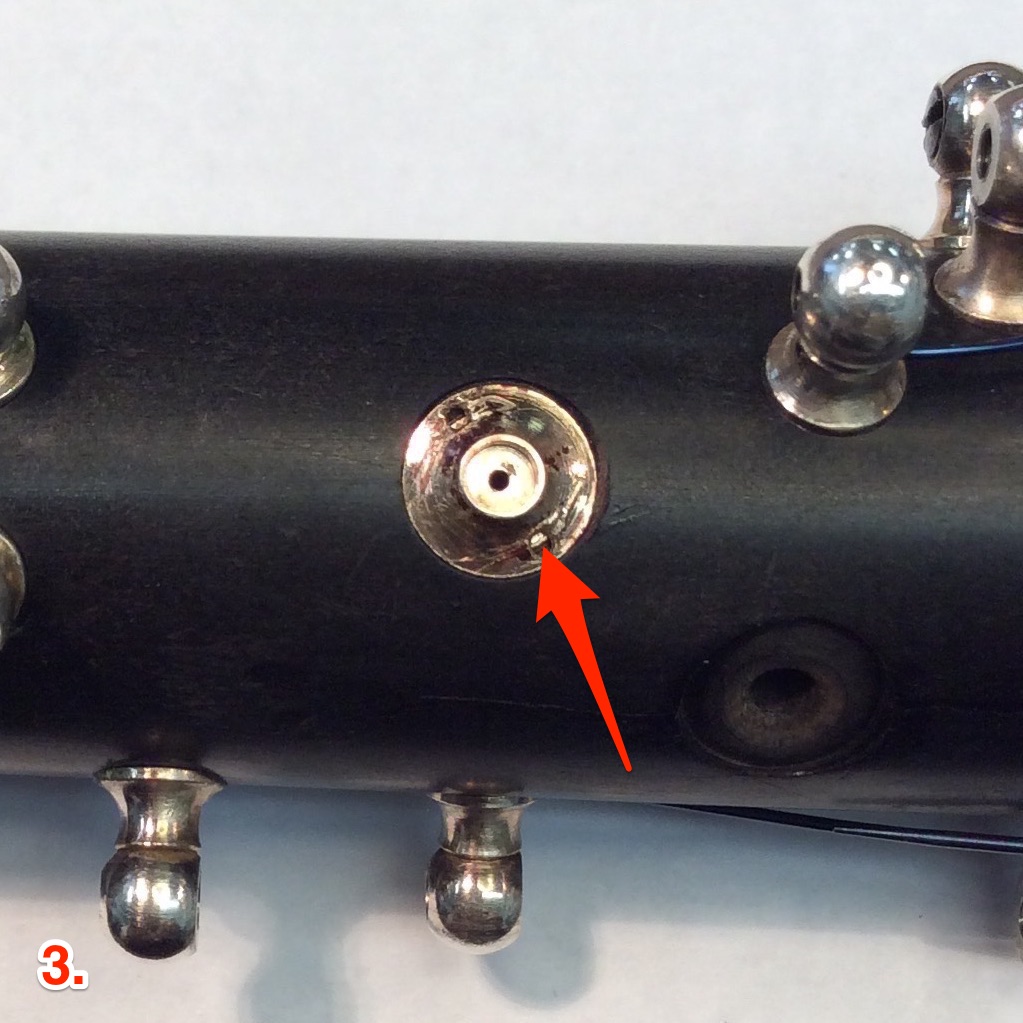
Photo number 3 is a pic of the troublesome vent re-installed before sealing. If you look closely through the vent removal hole, you will see the octave well underneath which is installed into the body of the oboe. With the octave well exposed through the octave vents, you are almost always guaranteed to have leakage. The leakage comes from and through the threads of the octave well and the octave vent. (Note: To see pictures of an octave vent and octave well separately, view our article “Should you seal octave vents.”)
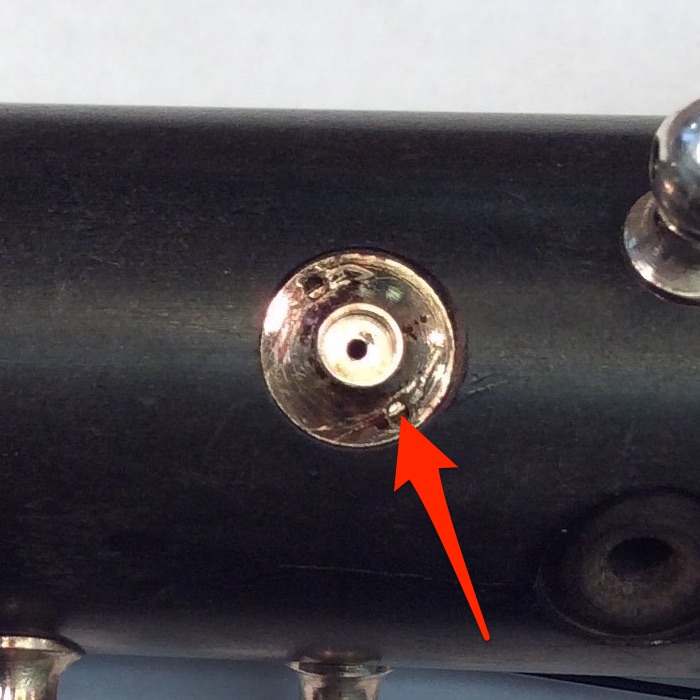
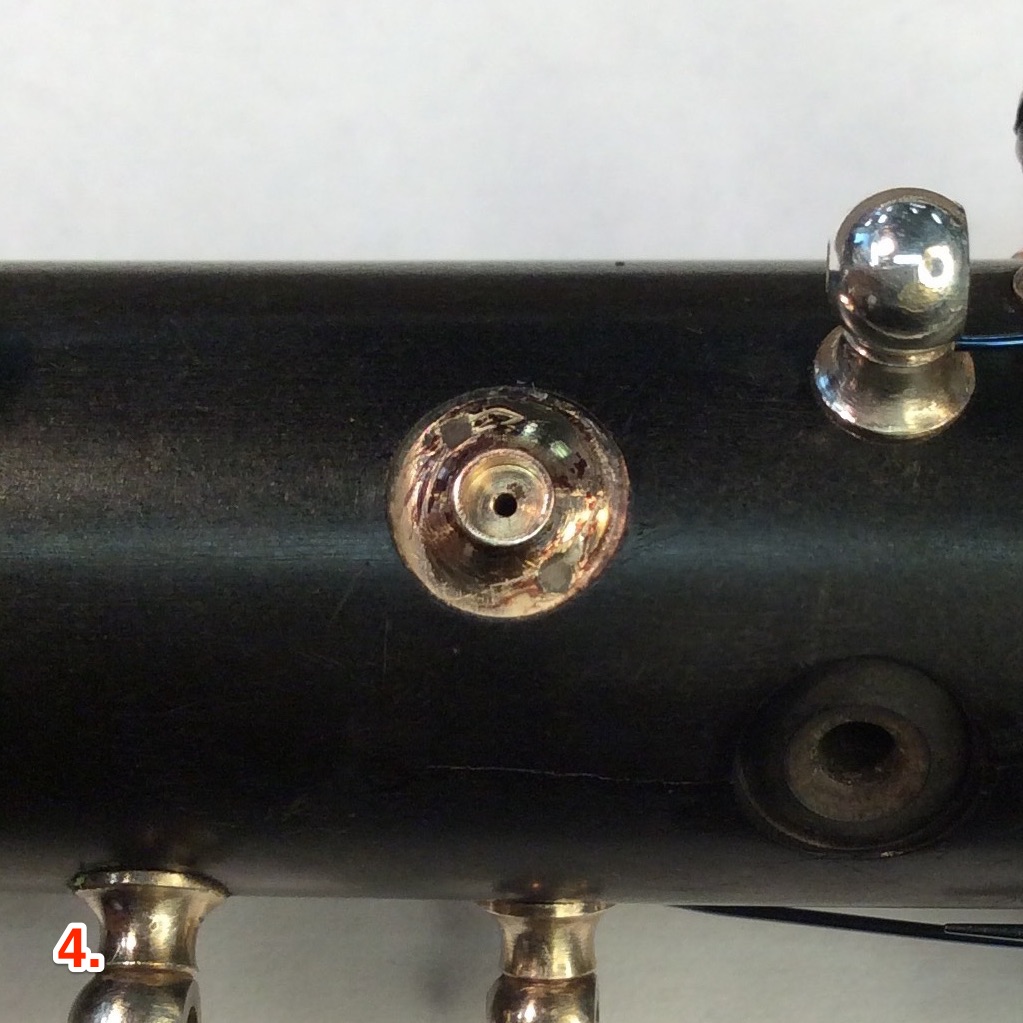
To conclude this article, photo number 4 is a pic of the troublesome vent re-installed and sealed completely. We seal octave vents with regular ole paraffin wax and in this pic you will notice the octave vent removal holes are filled with the wax as well as the outside circumference. Being diligent about sealing the vent removal holes and the outside circumference will guarantee an airtight seal between the metal vent pieces and between the vent and the oboe body. After sealing the vents properly, all you have to worry about is having every pad on your oboe perfectly level and sealing. 🙂
We hope this article has helped you understand octave vent sealing a little better, especially with regard to octave vent removal holes. Most of you will never need to worry about this issue, but if you do, you are now equipped to deal with it properly. The team at Onks Woodwind are always here to assist whether you need help sealing your octave vents or if you have a general oboe question. Contact us today!

